
How to backup Windows files with Windows Subsystem for Linux (WSL) on a schedule - for free!
Backup is always very important, and often we already have the tools to do it for free - in this post I will show you how to use the already installed WSL on Windows 10 to automate your backups to a local secondary disk.
Prerequisites
For this to work you will need:
- Windows Subsystem for Linux up-and-running: More info here
- A secondary or external drive plugged in your computer
Step #1 - Create your bash script for backing up to a local drive
First we need to create the script which we will use to run the actual backup. I usually keep my scripts for this in “My Documents/BackupScripts/”. Open a notepad and paste the following:
#!/bin/bash
rsync -r /mnt/c/PLACE-YOUR-SOURCE-FOLDER-HERE/ /mnt/DRIVELETTER/DESTINATION-FOLDER/ 2>backup.log
This will copy the contents of the “Source” folder to the “Destination” folder and create an backup.log file that will contain any errors during the rsync operation. Your external drive should be mounted in /mnt/driveletter , with the same driveletter that you can find it in your “My Computer”
Step #2 - Schedule the task
In order to schedule the task to run automatically (for e.g once per day at 00:45) we will use Windows’ “Task Scheduler”
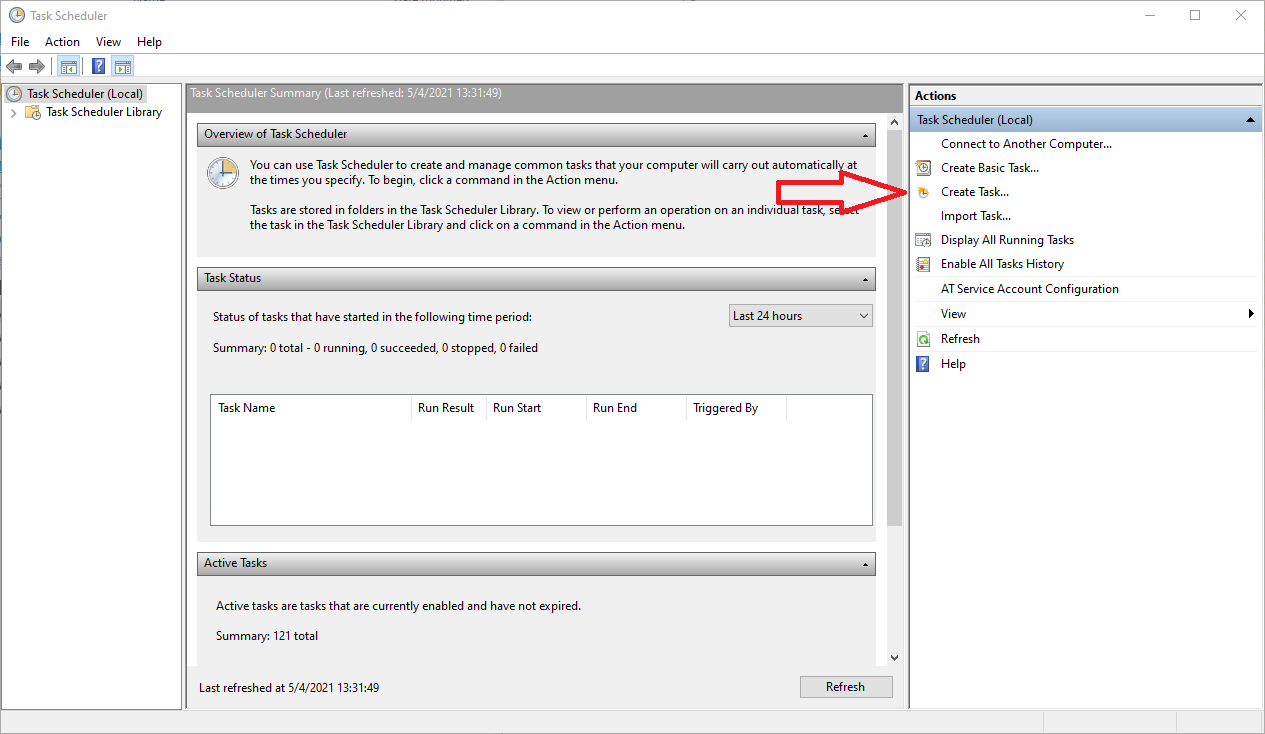
Run Task Scheduler, and select “Create Task” as per the below screenshot:
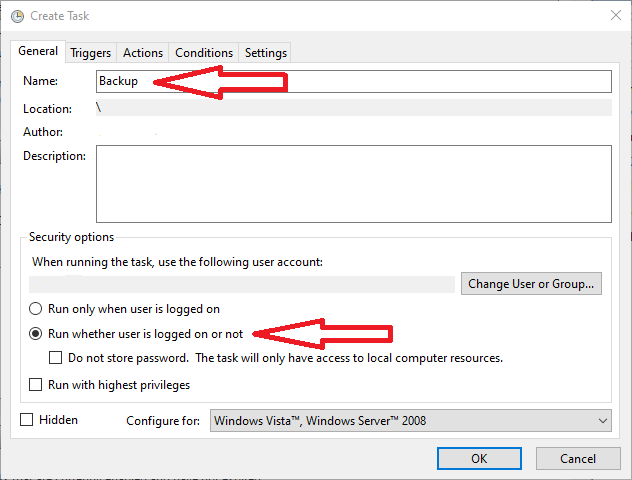
In the General tab, type a descriptive name, and select “Run whether user is logged on or not” as this will help us run the scripts in the background, even if we’re not logged in the PC.
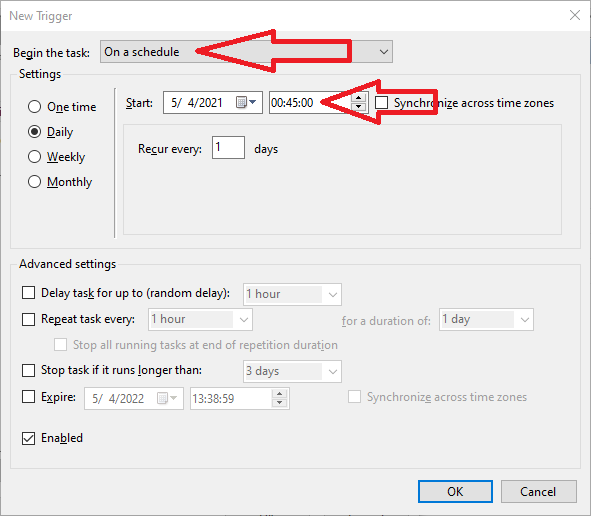
In the Triggers tab, we need to select when this automated script will run. In our example, we chose to run this “On a schedule” at 00:45 every day.
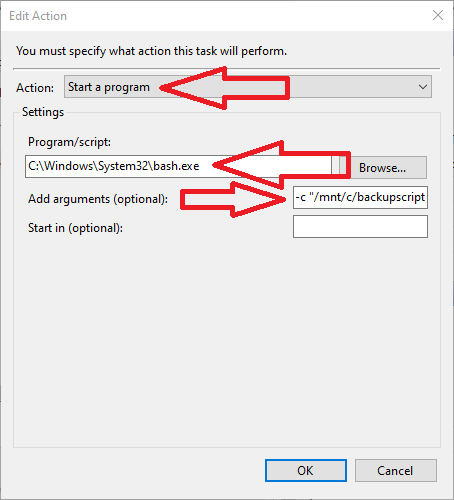
In the Actions tab, we need to run the actual script.
- Select “Start a program” from the drop down menu
- In Program/script add “C:\Windows\System32\bash.exe”
- In Add arguments (optional) add “-c “/mnt/c/Users/yourusername/Documents/BackupScripts/backupscript.sh”” using the location and script name you used in “Step #1” above.
Additionally you can select “Allow task to be run on demand” in “Settings” tab if you’d like to run the backup manually, and it’d be wise to set “Stop the task if it runs longer than: “ as to avoid any errors during the backup to run the task indefinately.
If you’ve selected all the options you need, click OK to save the task - it will ask for the user password as we have selected “Run whether user is logged on or not” at the start, and it needs to save your password to do that.
That’d be all - now the scheduled task will call the backup script and it will copy your source folder to the destination folder automatically.
Additional Optional Steps
You can modify the above script to add any of the below functionality:
- Create a seperate folder per backup (for e.g on the date that the backup was taken) - using “DATE=
date +%Y.%m.%d” and adding “/$DATE” in your destination folder path” - Create a compressed file of the whole backup, using tar instead of rsync
- Backup to a remote SMB share with SSH, by adding “ssh user@IP:/destfolder/” as your destination
- Mail the log to yourself if any errors occurred using:
BODY="$(cat "/mnt/c/logfile")"

[ -s "/mnt/c/logfile" ] && echo $BODY | mail -aFrom:frommail@mail.com -s "Backup Log" destinationmail@mail.com
Thank you for reading! Be sure to share this post if you found it helpful and don’t hesitate to chat with me about it!
This post was first published on Stathis’ log book by Stathis Athanasiadis aka StatAth
Comments